Something many of us will remember from primary school - the making of a St Brigid's cross is a lasting tradition.
Perhaps the most painstaking part of manufacturing the crosses lies not in their making at all, but in trying to source quality rushes.
For those living in urban areas, this may be difficult.
A journey out to the countryside may be required.
Step-by-Step Tutorial to make a St. Brigid's Day Cross
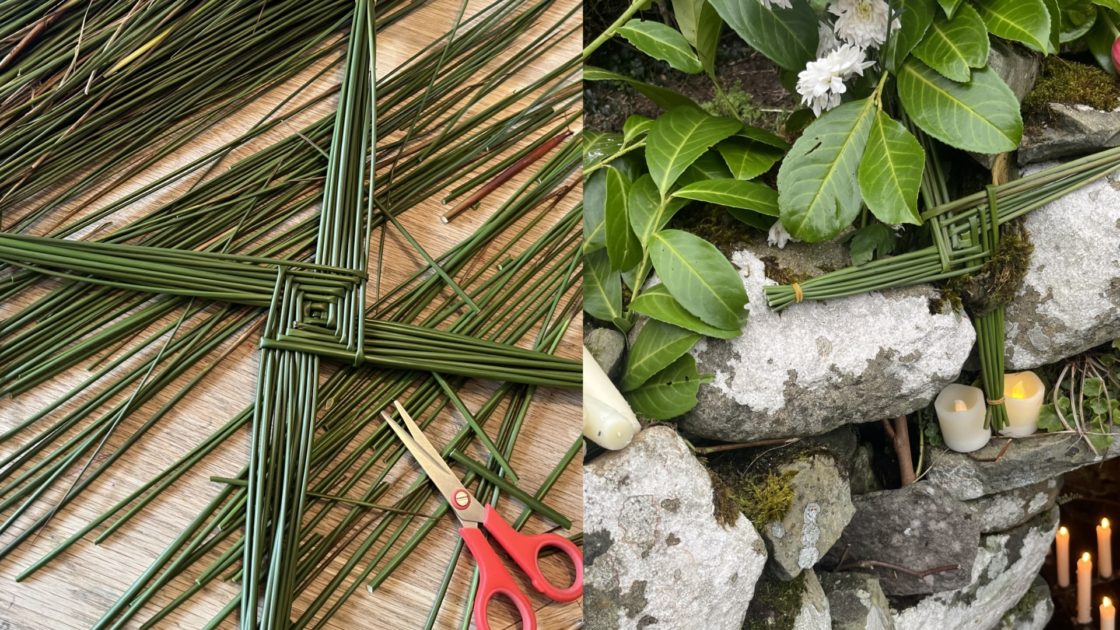
Once you have acquired your rushes, you need to lay a solid foundation for your cross.
This means placing one rush horizontally, then bending a second rush over it to form a 'V' or 'T' shape.
Then keeping them in place with my thumb in the centre.
To start the weaving process, continue adding rushes.
Bend each new rush over the previous one, and rotate the entire cross 90 degrees clockwise after each addition.
This creates a central, tight diamond shape.
I keep a tight hold of the centre of the cross.
Keep the place where each rush is bent firmly in place, to ensure that the middle of the cross stays tight and does not fall apart.
Continue weaving until you have a strong cross, with at least eight or nine rush ends on each arm of the cross.
Tie each end with elastic bands or string and snip the ends of the rushes to make them all the same length.
You should have the perfect St Brigid's cross then, at least this method has never failed me.
Blessing of the Cross
If you want to go the whole way, take your cross to one of the many St Brigid's wells across the country to get it blessed by its holy water.
Hang it up in your home and make another if you have any animal sheds.
The crosses are believed to invoke St Brigid's protection against fire, evil, and disease, with new crosses traditionally replacing old ones.
Eva Osborne
For the latest Waterford News and Sport, tune into WLR News on the hour and download the WLR App for news on demand.